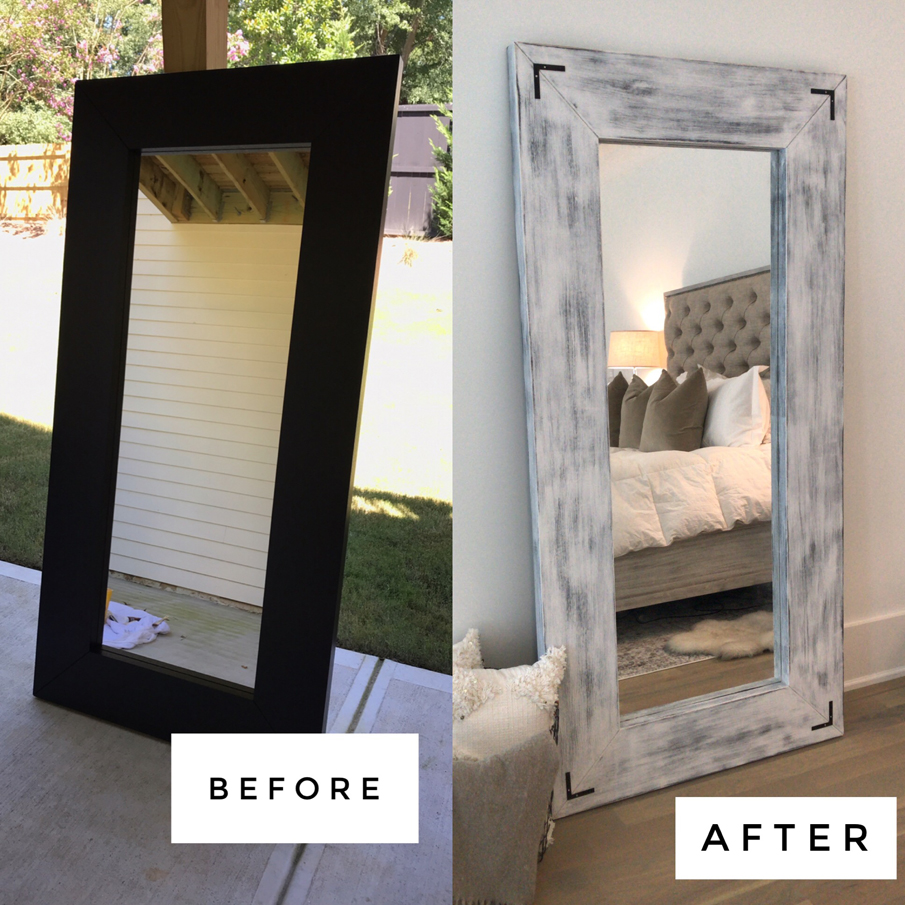
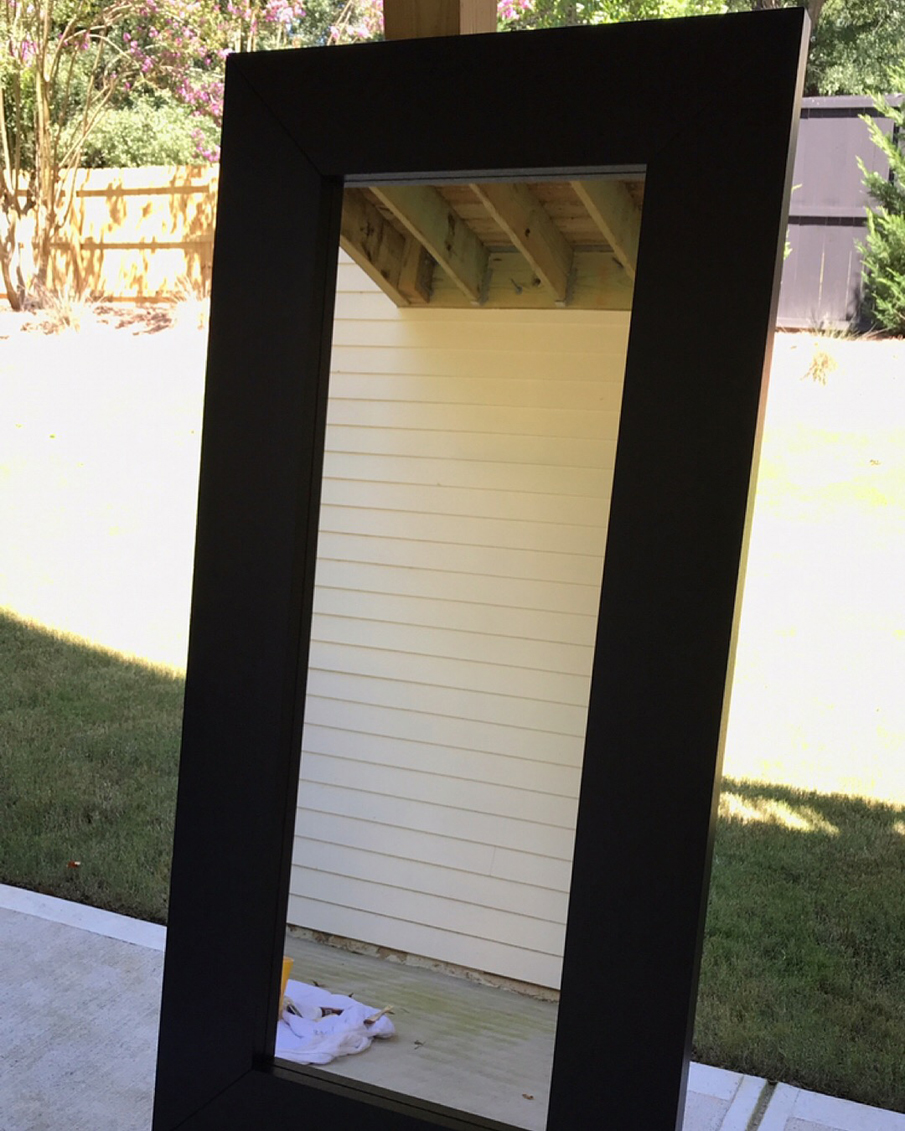
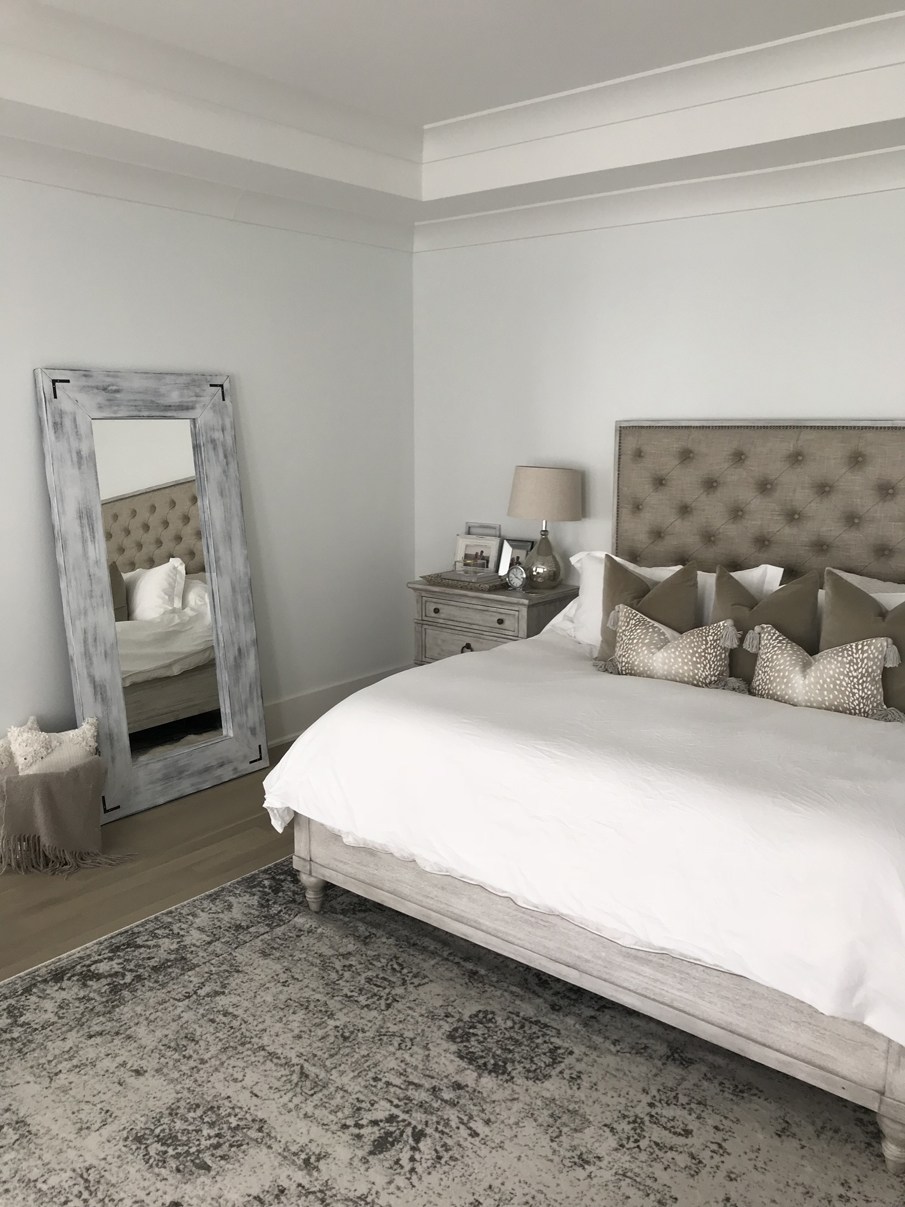
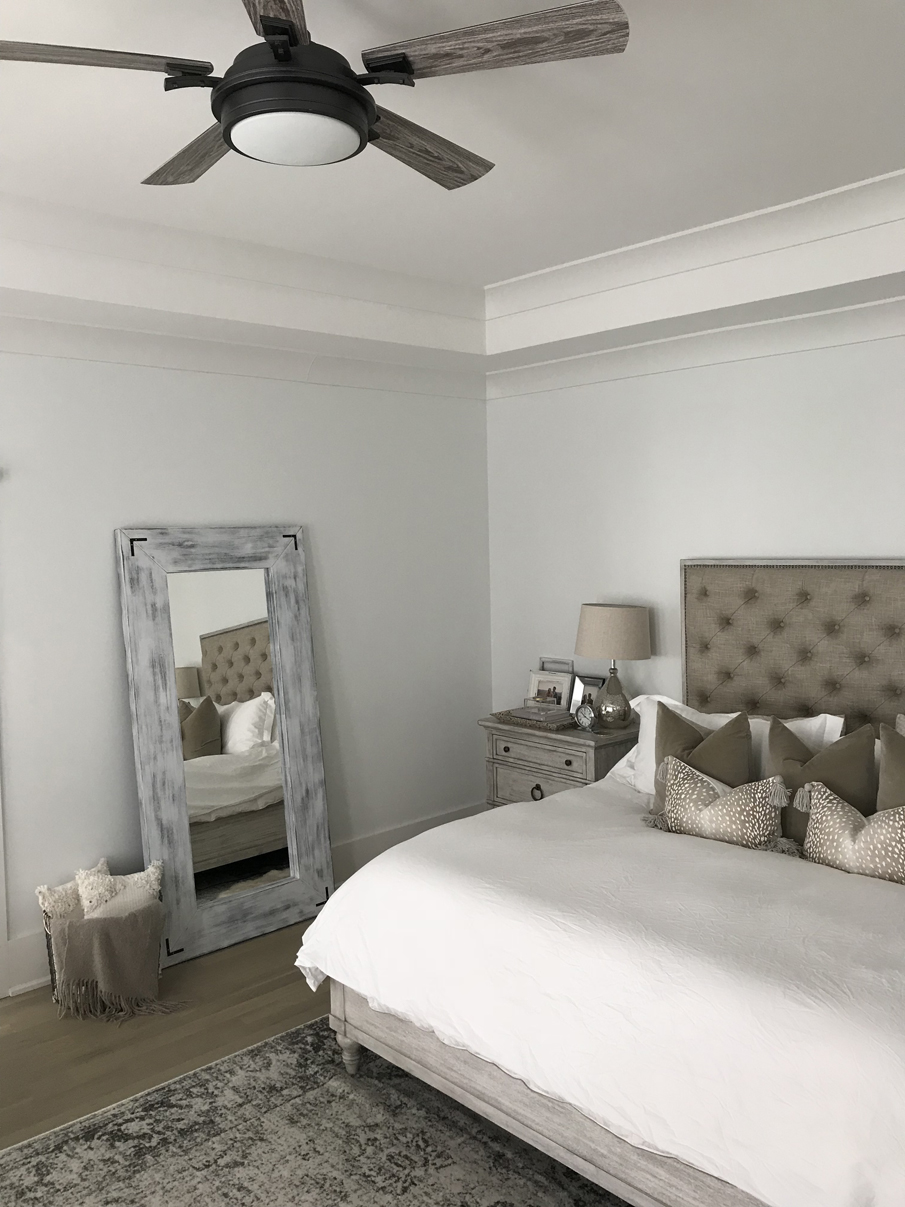
After we got our bedroom furniture, I looked at what felt like 1 million full-length mirrors for our master. Some were cheapies, some were stupid expensive, but none of them were exactly what I was picturing. I kept coming back to this Ikea mirror because of its size and its large, seemingly expensive frame.
(It was $99 when I bought it, but I noticed it is now $149 on their website – so, sorry for the false IG info! #inflation)
I ordered it and waited while googling, “Where even is Holland?” “What is a Swedish meatball?”, all the while still scouring the interwebs for inspo. When it came in, my suspicions were right. It was the perfect size, but the stark black was way too harsh (Ty) for our neutral bedroom. So naturally, I poured some wine, turned to Pinterest, and set out to make it into the mirror of my farmhouse dreams. It actually worked!
This wasn’t my first attempt at an Ikea hack. Who remembers this shelf situation from way back when in the old apartment!? Parts of me are still covered in gold paint.
WHAT YOU WILL NEED:
- A dropcloth – I used an old leopard sheet, because duh.
- An electric sander or Sandpaper – I used this hand-sanding tool towards the end.
- A chip brush – I used a 3-inch chip brush like this one.
- Chalk Paint – I used the Rustoleum color ‘Linen White.’
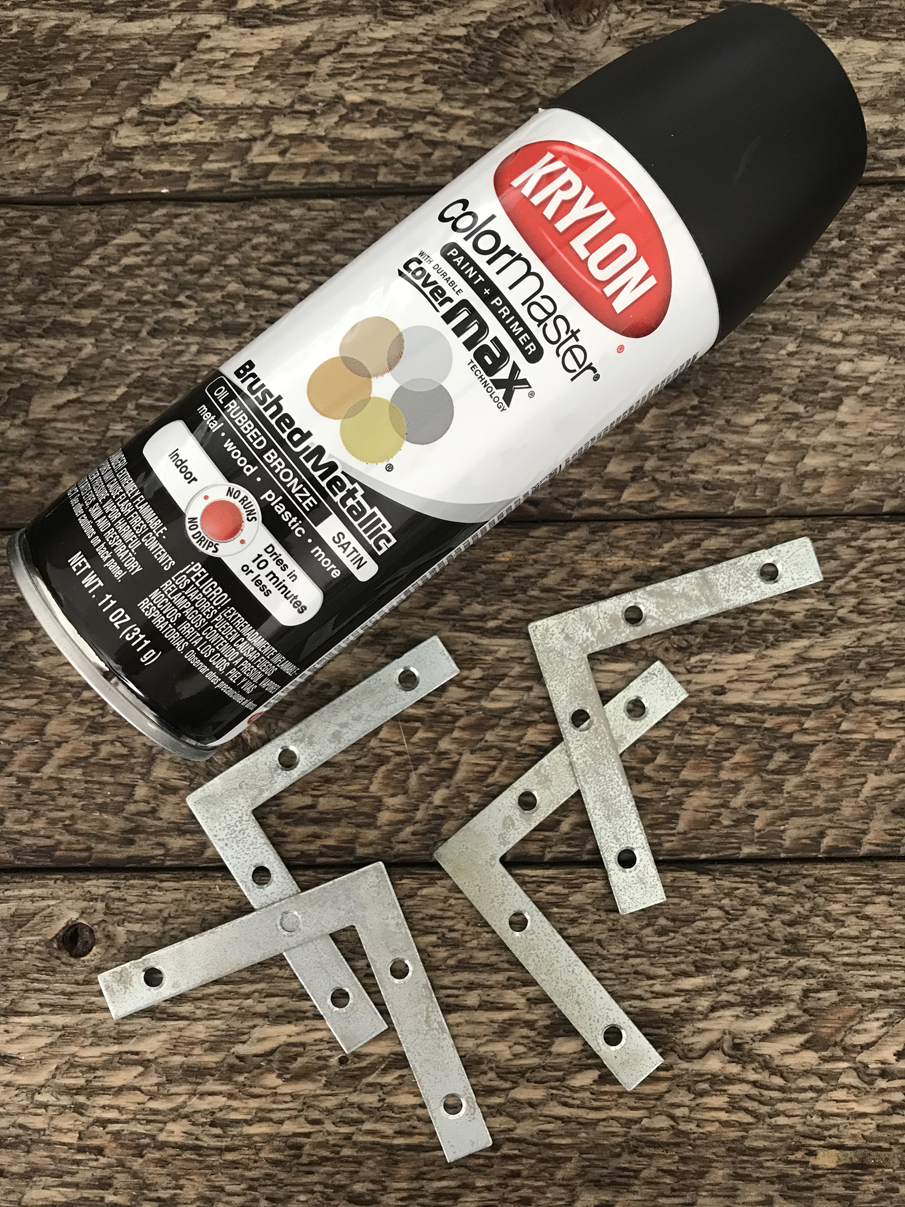
- Pack of L-brackets
- Spray paint – I used Krylon in ‘Oil Rubbed Bronze.’
- A drill/electric screwdriver
- A lint-free cloth – I keep these on hand for all my projects!
- Gloves!! Your nails will thank you. Plus, it’s important to accessorize even when crafting. (This is my tool kit, FYI)
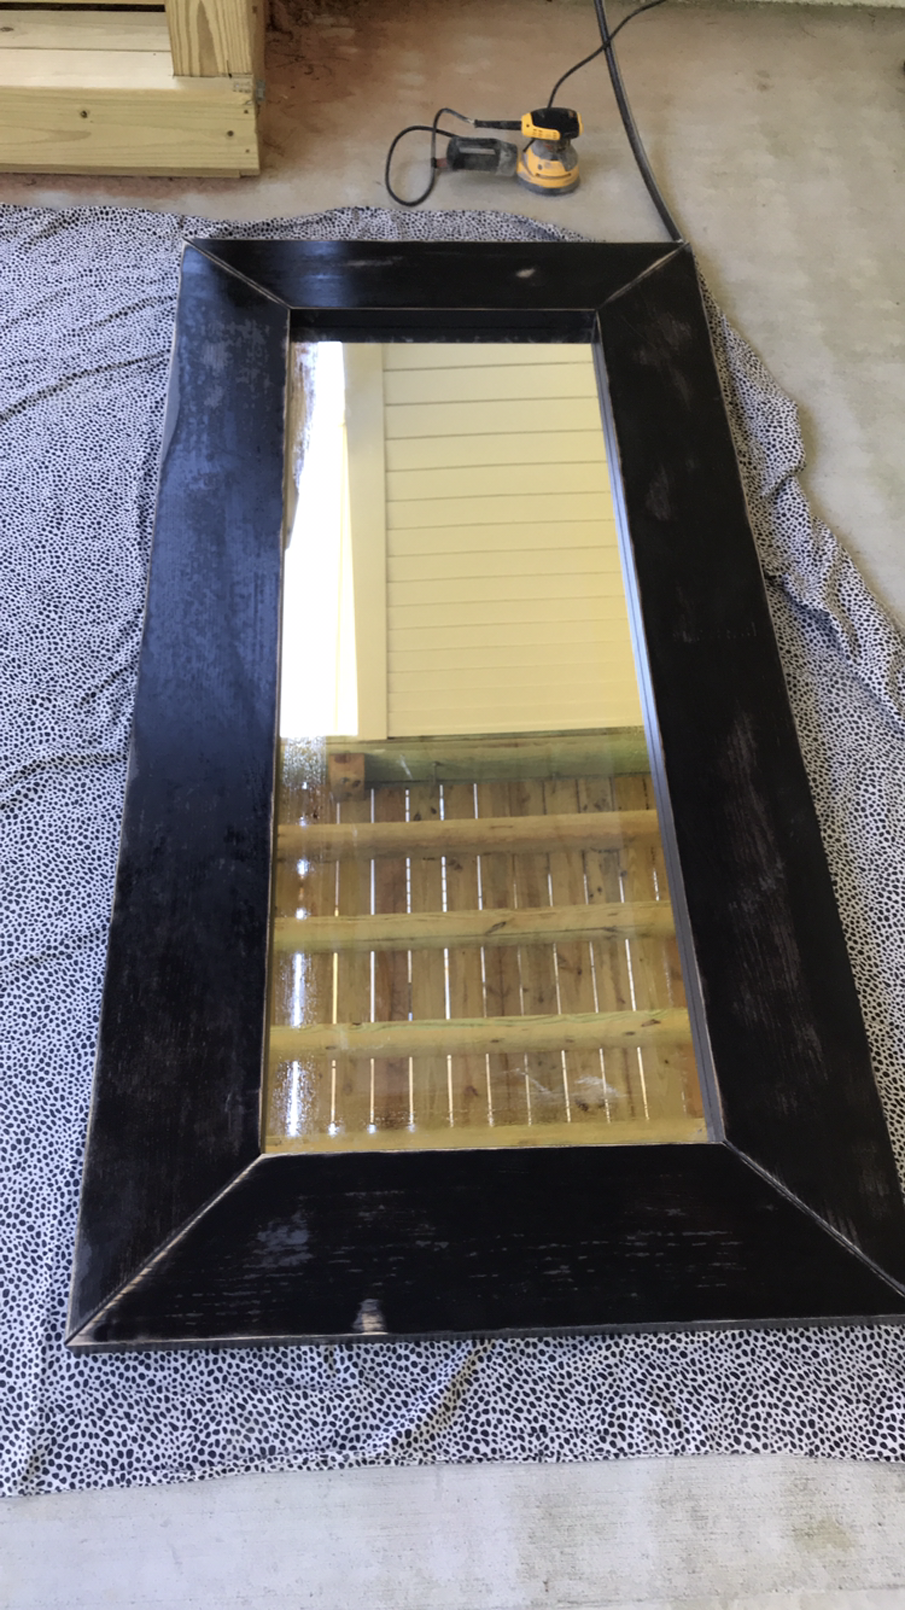
STEP ONE: Lightly sand the entire mirror, including the edges. I used my electric orbital hand-sander, which is a HUGE time-saver. The sanding doesn’t have to be perfectly even since we are going for a more rustic, aged look, and actually want some of the black to shine through in the end.
Pro Tip: Have someone else carry the mirror to your dropcloth because that thing is HEAVY.
STEP TWO: Wipe off the excess dust with a damp, lint-free cloth. Using your chip brush, dry-brush chalk paint onto the entire mirror. I used this kind in the color ‘Linen White,’ but any chalk paint will work. Do not wet your paintbrush, you will want the strokes to be a little more separated.
I did two coats of just lightly dry-brushing the paint on. Again, you don’t want this to be perfectly even, it should be darker in some places than others.
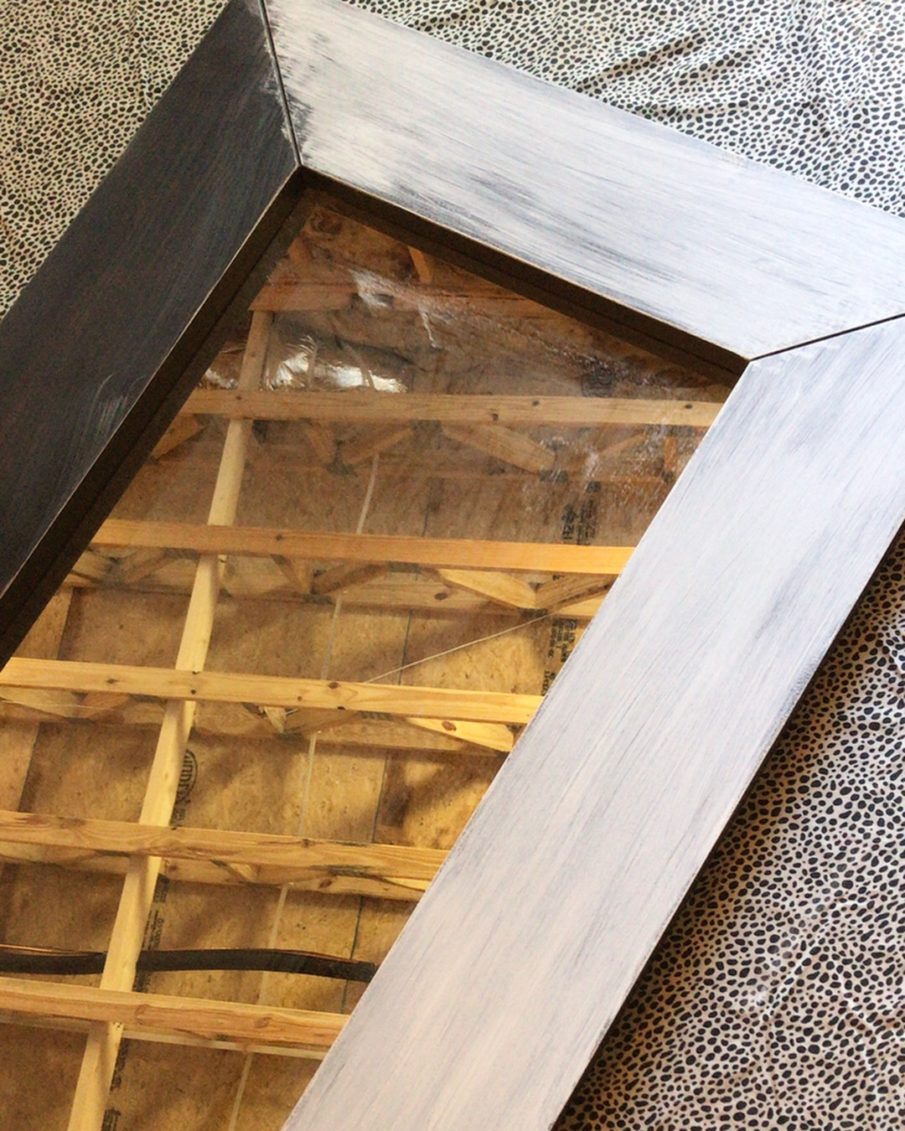
STEP THREE: Once the paint is completely dry, go back over the entire mirror with sandpaper (I used a hand-sanding tool this time and not the electric sander). I scuffed my mirror more in certain places like the edges and corners to make it appear more worn. Wipe again with a damp lint-free cloth to remove excess dust.
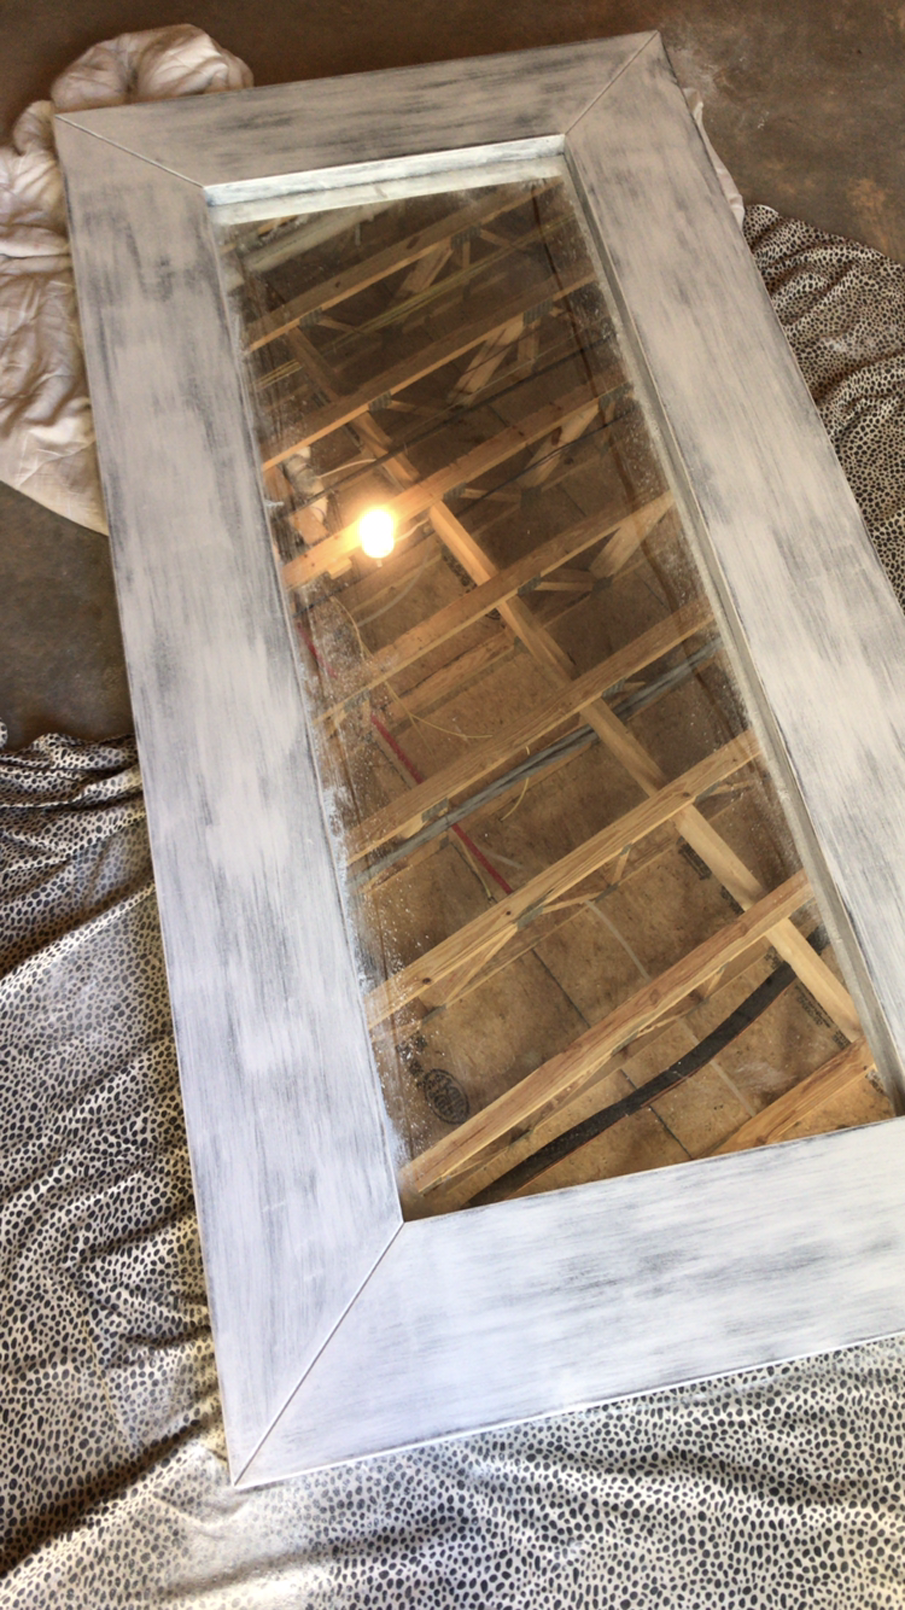
At this point, if you are happy with the color you can move on. I went back in and touched up certain areas with a little more paint and sanded them again to make sure I got the exact look I wanted. There is no right or wrong way to do this part, it is just based on your personal preference.
When you finish, use the scrapey tool from the pink tool kit above to remove the excess paint from the mirror.
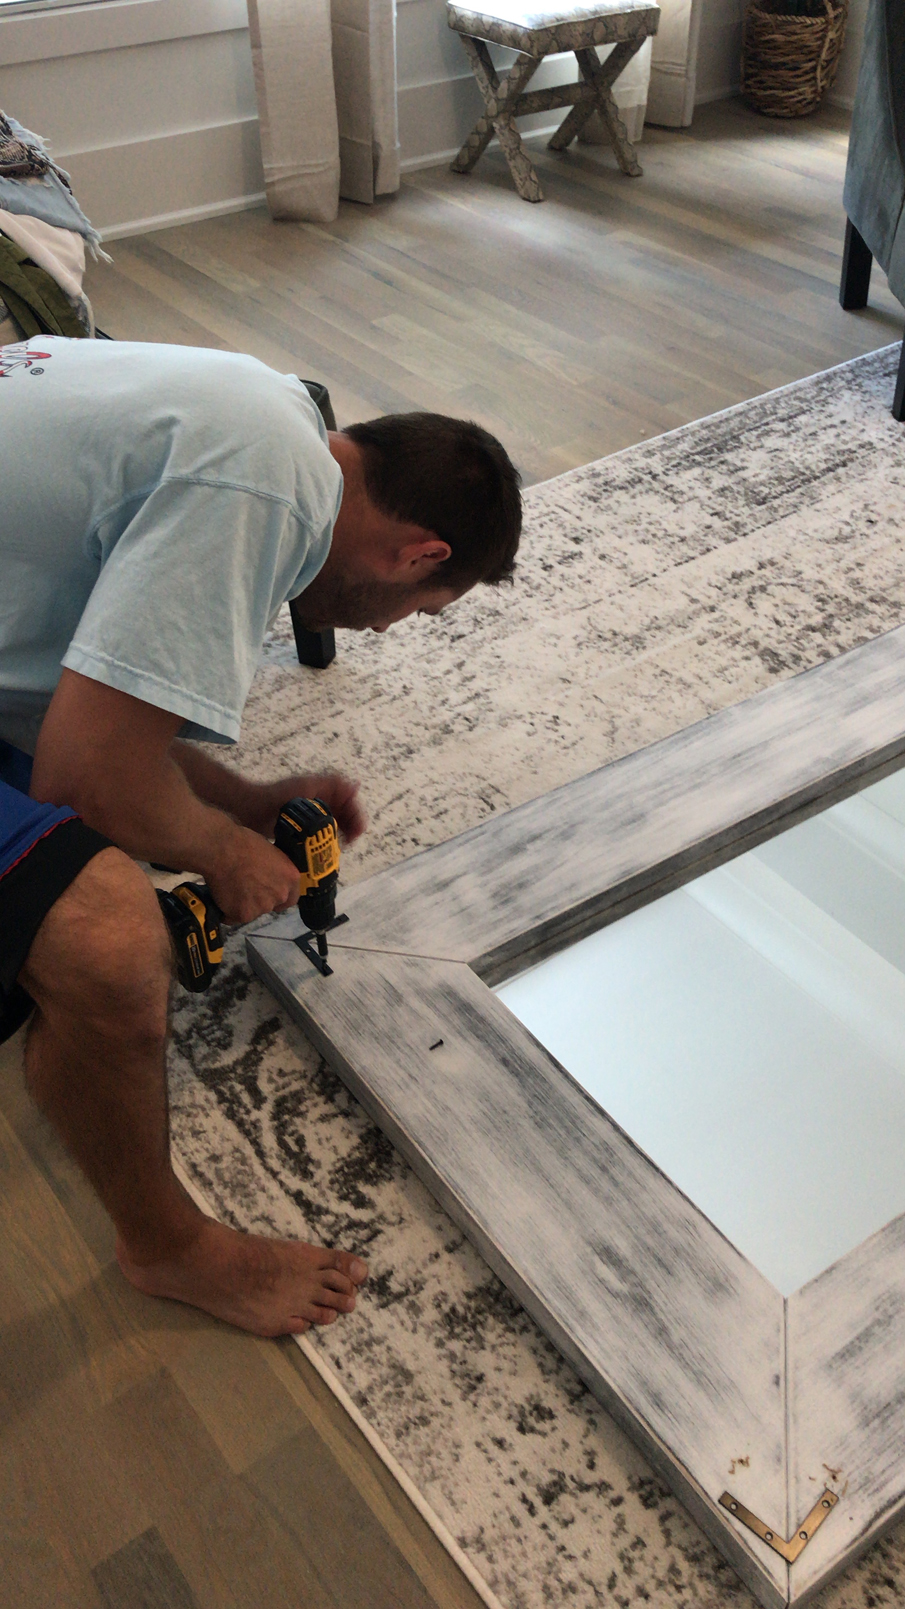
STEP FOUR: It still looked a little bit unfinished to me, so I decided to add some hardware. I bought a pack of L-brackets and spray painted them with Krylon spray paint in ‘Oil Rubbed Bronze.’
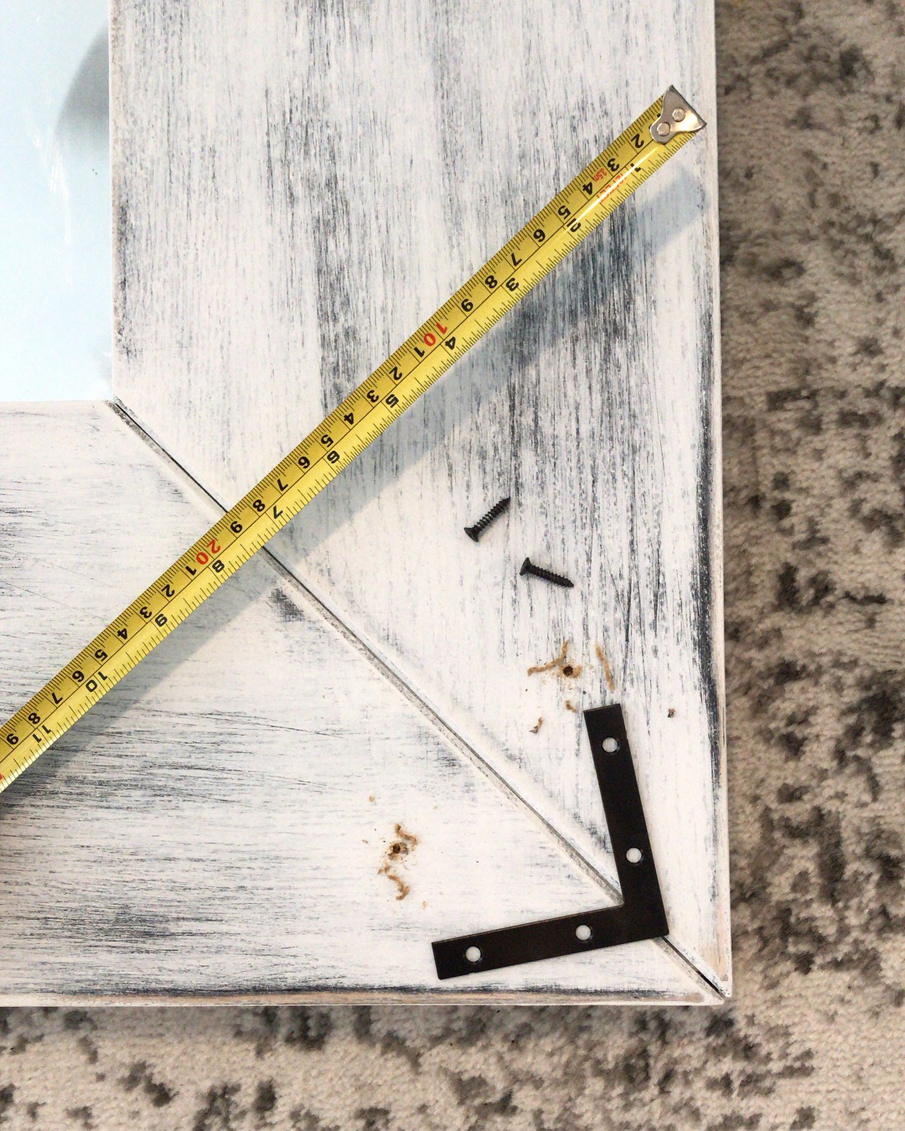
STEP FIVE: I measured two inches in on the mirror from each corner, making sure the point of the l-bracket lined up with the seam of the mirror, and then screwed the brackets on. Well, actually Will did. You will need an electric drill for this part (or possibly just a cute handyman husband).
Love him.
OUR EXACT 9×12 GRAY AREA RUG – UNDER $200!
ANTELOPE LUMBAR PILLOWS (my all-time favorites! I have them in my living room, too.) / OUR BEDDING / RUG

OUR BEDROOM SET / WIRE BASKET / CREAM LUMBAR PILLOWS / SHEEPSKIN RUG / GRAY AREA RUG / OUR BEDDING / VELVET PILLOWS / OUR CEILING FAN
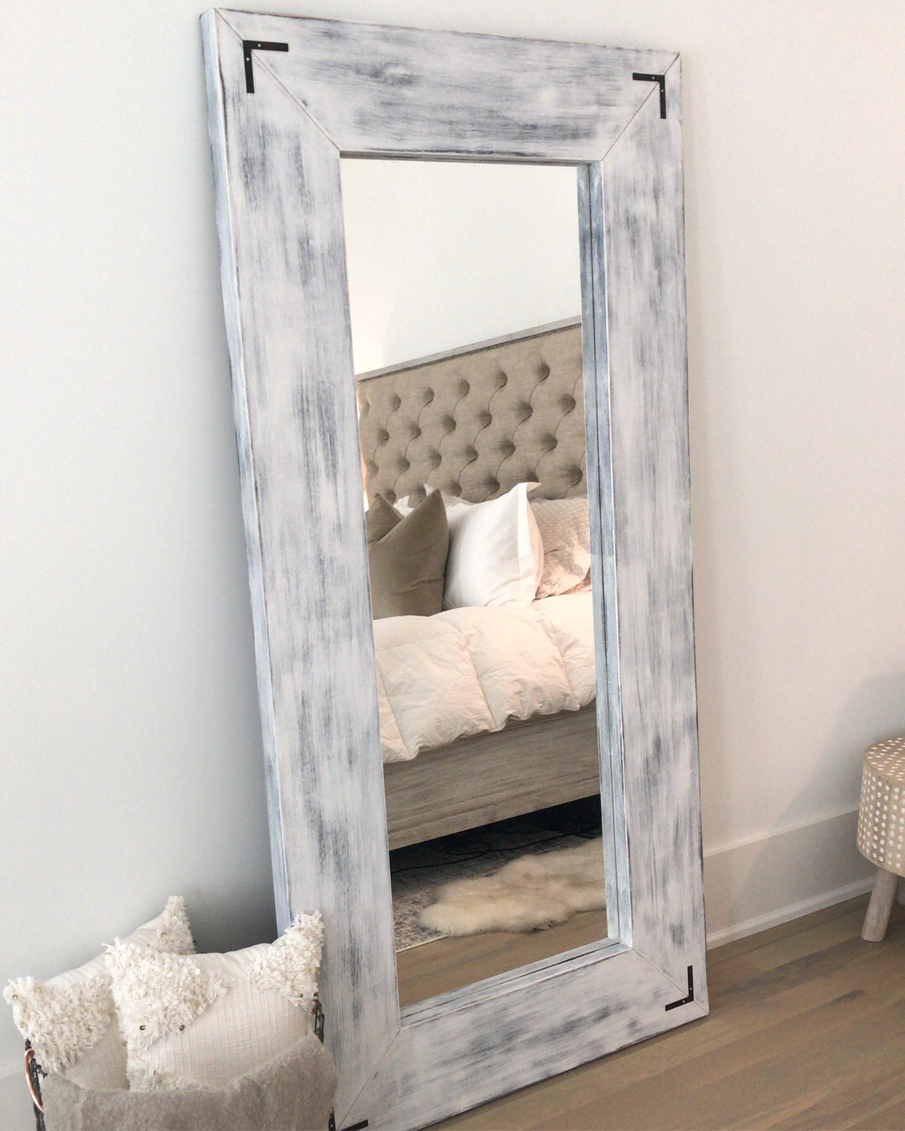
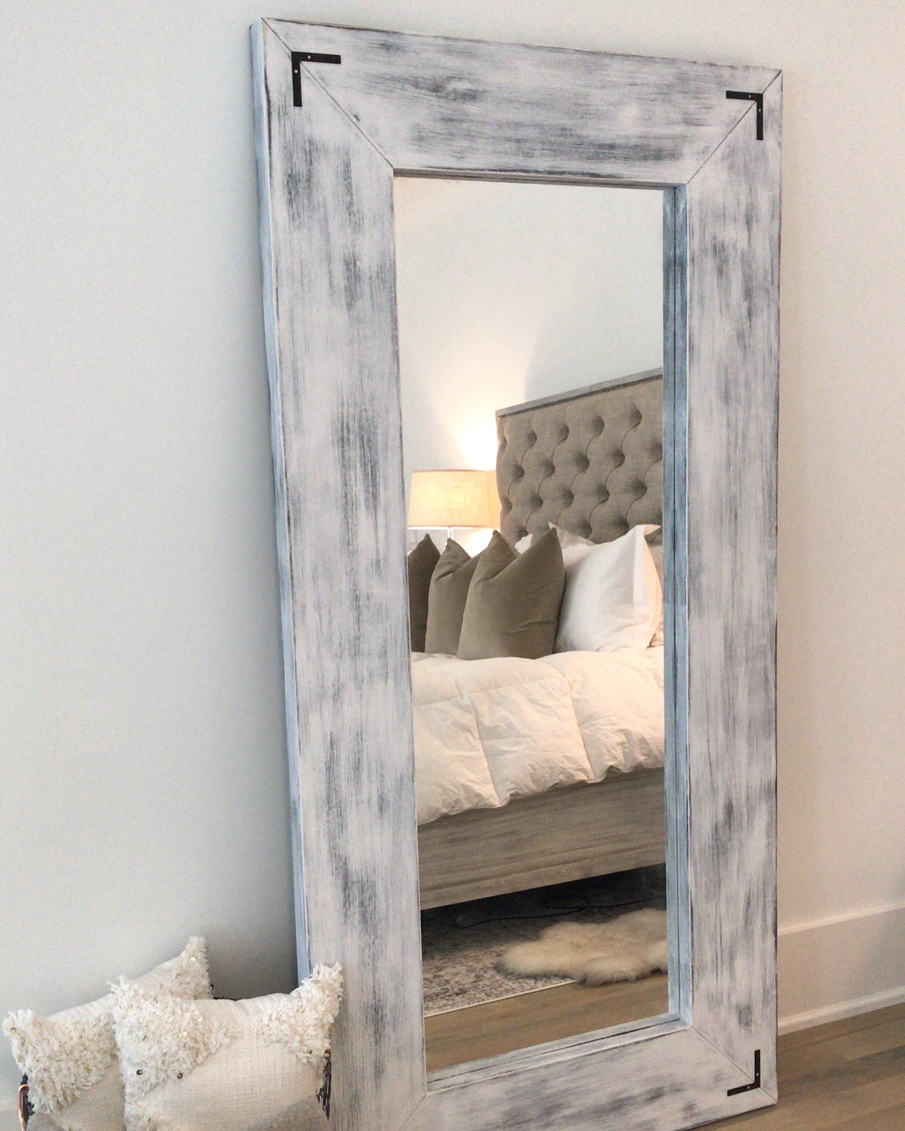
That’s it! Voila. A brand new, rustic, farmhouse-style leaning mirror. I am SO excited about how it turned out! Never leaving my bedroom again. I’d show you the rest of it, but I only cleaned the one half.
There is still a ton of delayed house stuff I wanna show you guys, so I hope you are into that kind of thing. Let me know! I love to read your comments.
![]()